The Lights
With the initial diagnoses I found that I had driven all the way with only the drivers low beam working. I didn't do much night stuff, save a couple of hours, and the high beams were operational. So off to Supercheap to get a new light bulb (H7,12v,55W) which are common and a Narta twin pack with bonus Park globes on special $47.00 ; bargain. That was the easy part, removed the rubber panel off the back of the light assembly and tried to remove the bulb; note swearing words inserted. A funny wire retaining clip that would not budge. Finally half an hour later onto Dr Google and presto, slight twist and lift movement required at the same time and out it came easily. Replaced and working perfectly. Now to address the faded, yellowed headlights themselves as they are all plastic now, no glass to be found.
 |
| Backyard Garage. |
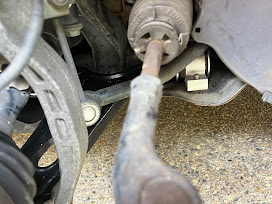
To remove the headlight assembly is not as simple as you would think. First you need to remove both front wheels so that you can access the plastic inner wheel arches and remove them. This then gives access to the 2 screws on both sides in a not nice position (skin debarking procedure I believe) in the inner wheel arches that hold the front bumper on along with about eight torx screws on top and bottom. Once you have removed the bumper you can then (and only then) access the 3 bolts holding each headlight assembly in. Ahhhhhh Italian design !!!!
And then the bloody connector !! Little bit of persuasion (Read a lot ) after years of not being removed and it finally came off.
The process to clean the yellowing was fairly simple. Clay bar first to clean, then wet sandpaper in 3 grades, 1200, 2000 & 3000 grit to get to a nice smooth finish. Then finish off with the polisher ( newly acquired from our good friend Supercheap) and you have one almost new looking headlight. Chalk and cheese.
Just the drivers side to do and put all the parts back together again and make sure it still all works; which I can assure you it did.
With the humid weather lately, the second headlight has not yet been done, so instead attention has been paid to cleaning the seats, both back and front even thought eventually the back seats will be removed. I decided to use the same product on Aurelia that I used on Renoir and they they are all from Bowdens. Orange Agent for the deep clean followed by treat with Leather Love and a final coat of Leather Guard. First I tried one of the rear seats ( its a 1/3, 2/3 split to make sure that the Orange Agent wouldn't affect the rather shabby "leather" vinyl. I used a toothbrush to scrub small sections and then wiped off, spray rinsed with water and presto, just like magic a clean seat.
Once all the seats were done its just a matter of applying three coats of Leather Love, buffing in between coats while still wet, followed by a final application of Leather Guard; leave for 5 minutes and then buff off. Finished. This small section was the first test and so a couple of weekends and at the end of Australia day the seats were completed and except for some tears and general wear and tear, came up a treat. PS I did swap the toothbrush for a small nail brush which did speed up the process ever so slightly.


Apple. That's amazing.
ReplyDeletethanks Ali, so much therapeutic fun and learning new stuff every moment. PS Appslee is a slight variation on our previous Tassie residence, The Pontville Station Masters Residence on the now defunct Greenponds line from Brighton to Apsley.
Delete